

Using Stick and Stitch Embroidery Patterns.
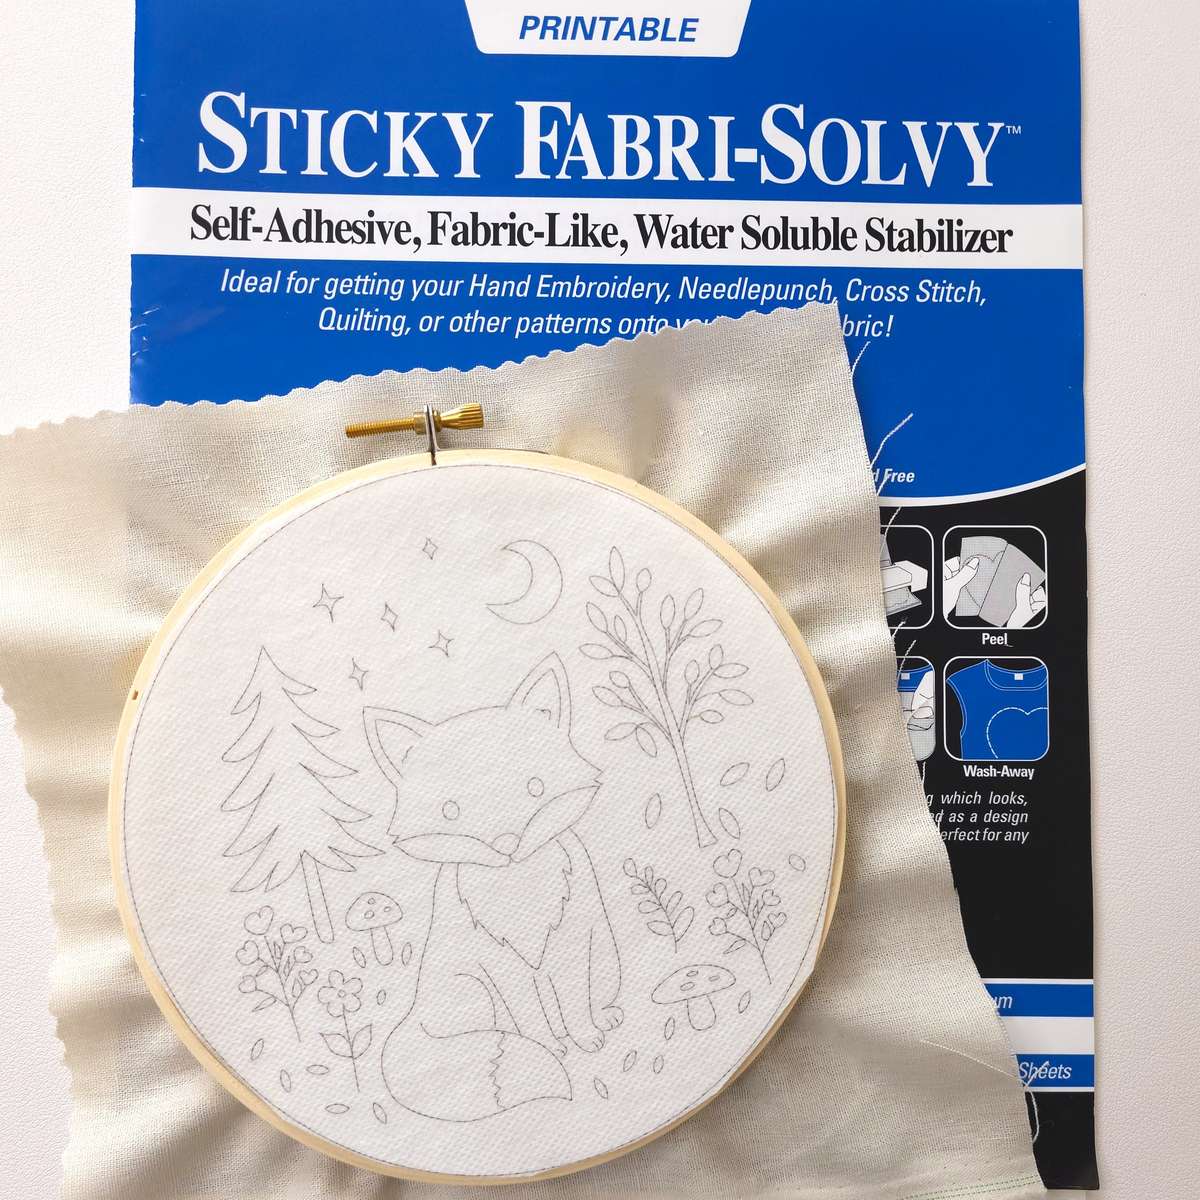
Stick and Stitch Embroidery
If transferring an embroidery pattern onto fabric is your least favorite part of starting a new project, Sulky Sticky Fabri-Solvy might become one of your favorite embroidery supplies.
Sulky Sticky Fabri-Solvy is one of several brands, but this tool is often referred to as stick-and-stitch or print-and-stitch.
Sulky Sticky Fabri-Solvy is one of several brands, but this tool is often referred to as stick-and-stitch or print-and-stitch.
What are Stick and Stitch Patterns?
Stick and Stitch fabric is a printable, self-adhesive, water-soluble stabilizer that allows you to place an embroidery pattern directly onto your fabric. Instead of tracing a design with a pen or trying to see through dark or thick fabric, you simply print or draw your pattern onto the stabilizer, stick it to your fabric, and stitch through it. Then rinse it away with water when you’re finished stitching.
The printable sheets are 8½ x 11 inches, so you can run them through many home printers and print your embroidery pattern directly onto the stabilizer.
For hand embroidery, this means you can skip much of the traditional pattern-transfer process.
It’s especially useful for detailed designs, dark fabrics, clothing, and linens.
It’s especially useful for detailed designs, dark fabrics, clothing, and linens.
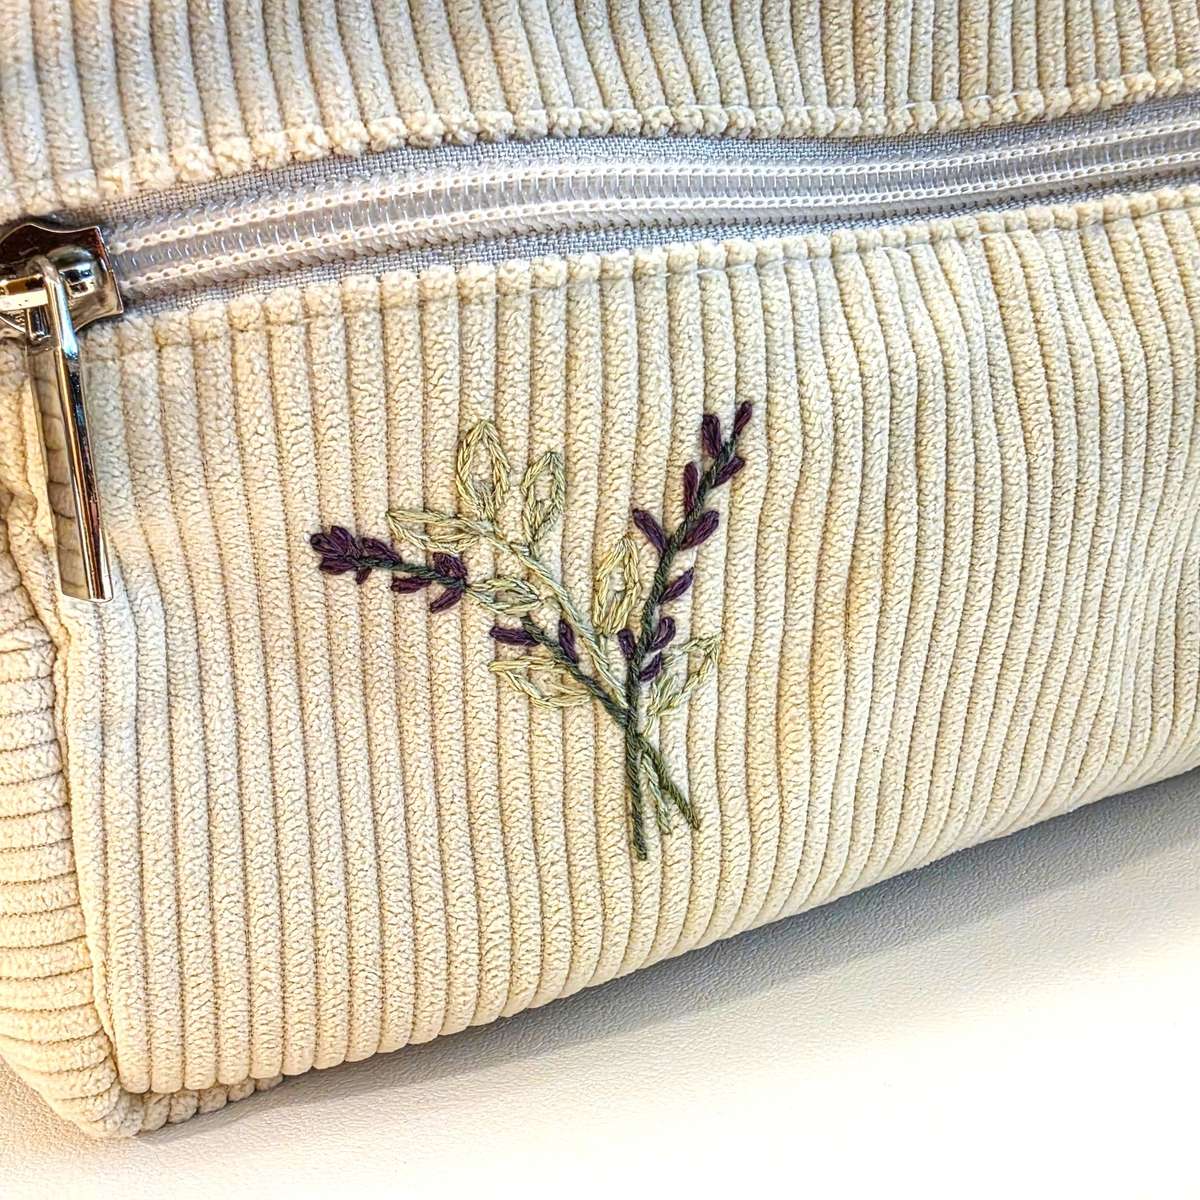
It's difficult to trace a pattern onto a textured bag like the one shown above, but by using a stick-and-stitch pattern, I was able to add a simple design.
The Pros and Cons
Personally, I like using stick-and-stitch patterns. However, they are not for everyone or suitable for every embroidery project. While there are various brands available, my experience is limited to Sulky, and my opinions are based solely on that brand.
One of the biggest advantages is convenience. Normally, transferring an embroidery design might involve a lightbox, transfer pen, tracing paper, iron-on transfer, or another transfer method. Those methods work well, but sometimes, like with the bag above, you need another option.
One of the biggest advantages is convenience. Normally, transferring an embroidery design might involve a lightbox, transfer pen, tracing paper, iron-on transfer, or another transfer method. Those methods work well, but sometimes, like with the bag above, you need another option.
Stick-and-Stitch is particularly helpful when:
- Your fabric is too dark to trace through.
- Your pattern has lots of small details.
- You are embroidering on clothing.
- You want to position several small motifs individually.
- Your fabric has a texture that makes drawing difficult.
- You simply don't enjoy tracing patterns.
It also makes small embroidery motifs incredibly easy to use. You can cut several designs apart, arrange them on your project, and move them around until you find the placement you like. That is one reason stick-and-stitch embroidery has become such a fun way to embellish jeans, shirts, sweatshirts, pockets, tote bags, quilt labels, tea towels, and other fabric projects.
Unfortunately, there is no single best embroidery transfer method. The best choice depends on your fabric, your pattern, and the project you're making. Here are a few things to consider before using stick-and-stitch patterns.
Unfortunately, there is no single best embroidery transfer method. The best choice depends on your fabric, your pattern, and the project you're making. Here are a few things to consider before using stick-and-stitch patterns.
- It can make the needle feel sticky. The adhesive may build up on the needle, especially during longer stitching sessions or in humid conditions.
- It adds resistance while stitching. You’re stitching through both the fabric and stabilizer, so the needle can feel harder to pull through.
- It must be rinsed away. That makes it a poor choice for fabrics, threads, or finished items that shouldn’t get wet.
- Color bleeding can be a concern. If your floss or fabric isn’t colorfast, rinsing the stabilizer can cause unwanted bleeding.
- It may leave residue behind. Dense areas of stitching can trap small bits of stabilizer, requiring extra soaking or rinsing.
- It can slightly change your stitching tension. Because the stabilizer adds another layer, stitches may feel different as you work, and you may pull them too tightly or leave them too loose.
- It can shift or wrinkle. If it isn’t applied smoothly, wrinkles or bubbles can distort the printed design.
- It’s more expensive than tracing. For simple patterns, using a washable pen, lightbox, or transfer paper may be cheaper.
- Printing can occasionally be troublesome. Printer settings, ink quantity, or feeding the sheet incorrectly can cause smearing or wasted sheets.
- It can obscure the fabric. Since you’re looking at the stabilizer rather than the fabric while stitching, it can be harder to judge exactly how the stitches look against the fabric until the stabilizer is removed.
- Very small or dense stitches can be harder to rinse clean. Thread painting, satin stitching, or closely packed areas may hold onto the stabilizer longer.
- It doesn't do well in humid conditions. Because it's water soluble, it starts to break down and get sticky if the air around you is very humid.
Although there are a few drawbacks, it is one of the simplest ways I've found to get from a pattern on the computer to the part of embroidery I enjoy most, the stitching. Plus, I have a few tips for getting the best results.
Once you start experimenting with individual stick-and-stitch designs, you may find yourself looking at every pocket, cuff, collar, tea towel, and tote bag as another place that could use a few stitches.
Once you start experimenting with individual stick-and-stitch designs, you may find yourself looking at every pocket, cuff, collar, tea towel, and tote bag as another place that could use a few stitches.
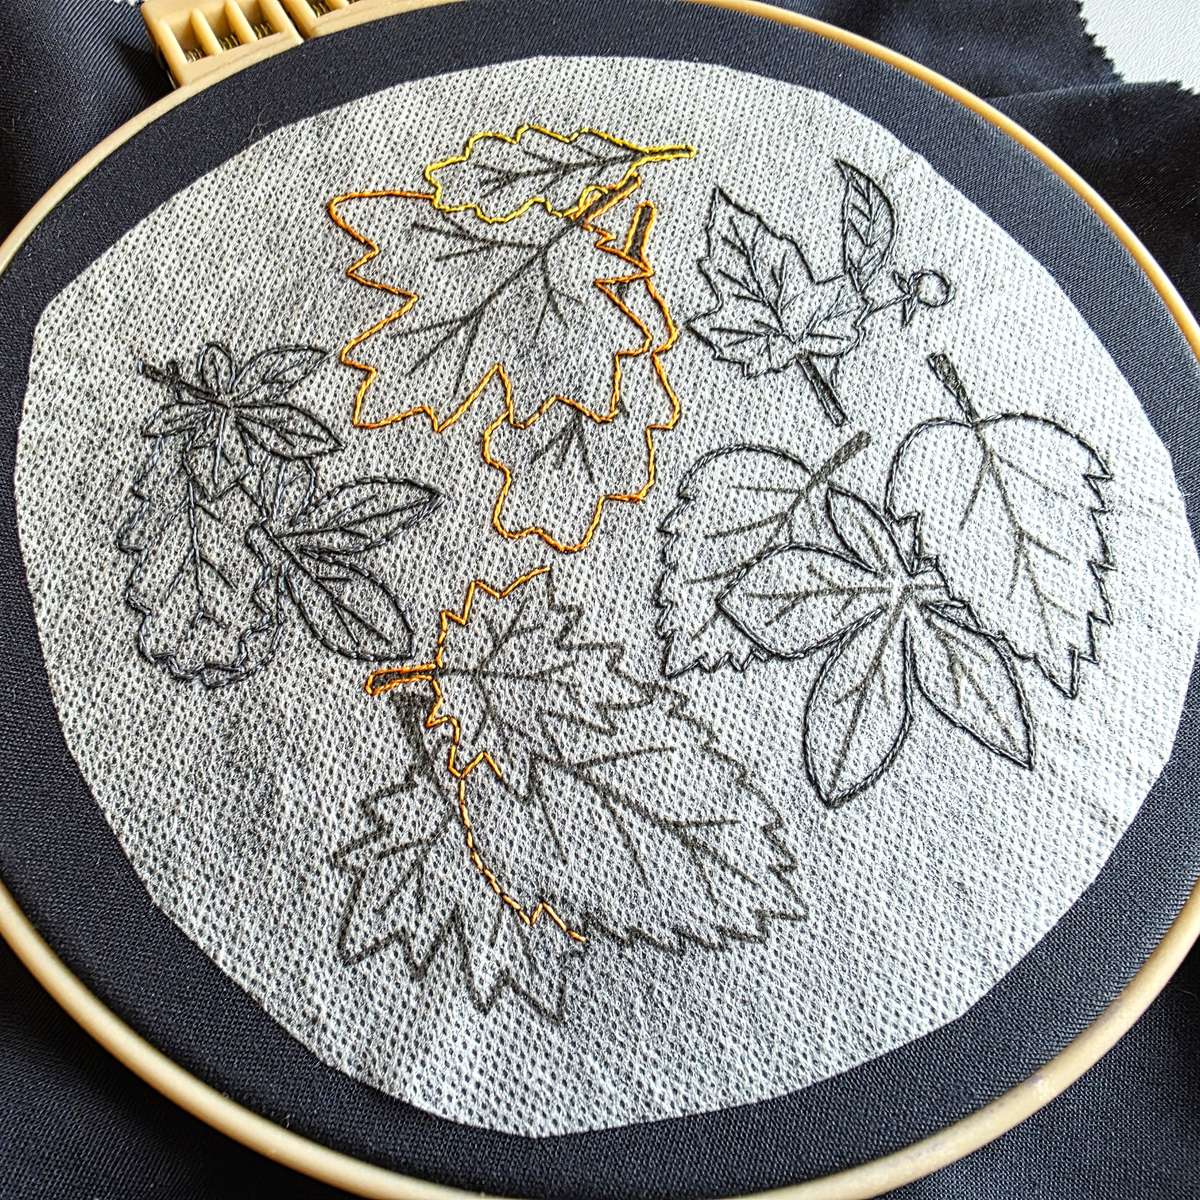
Dark fabric with a stick-and-stitch pattern
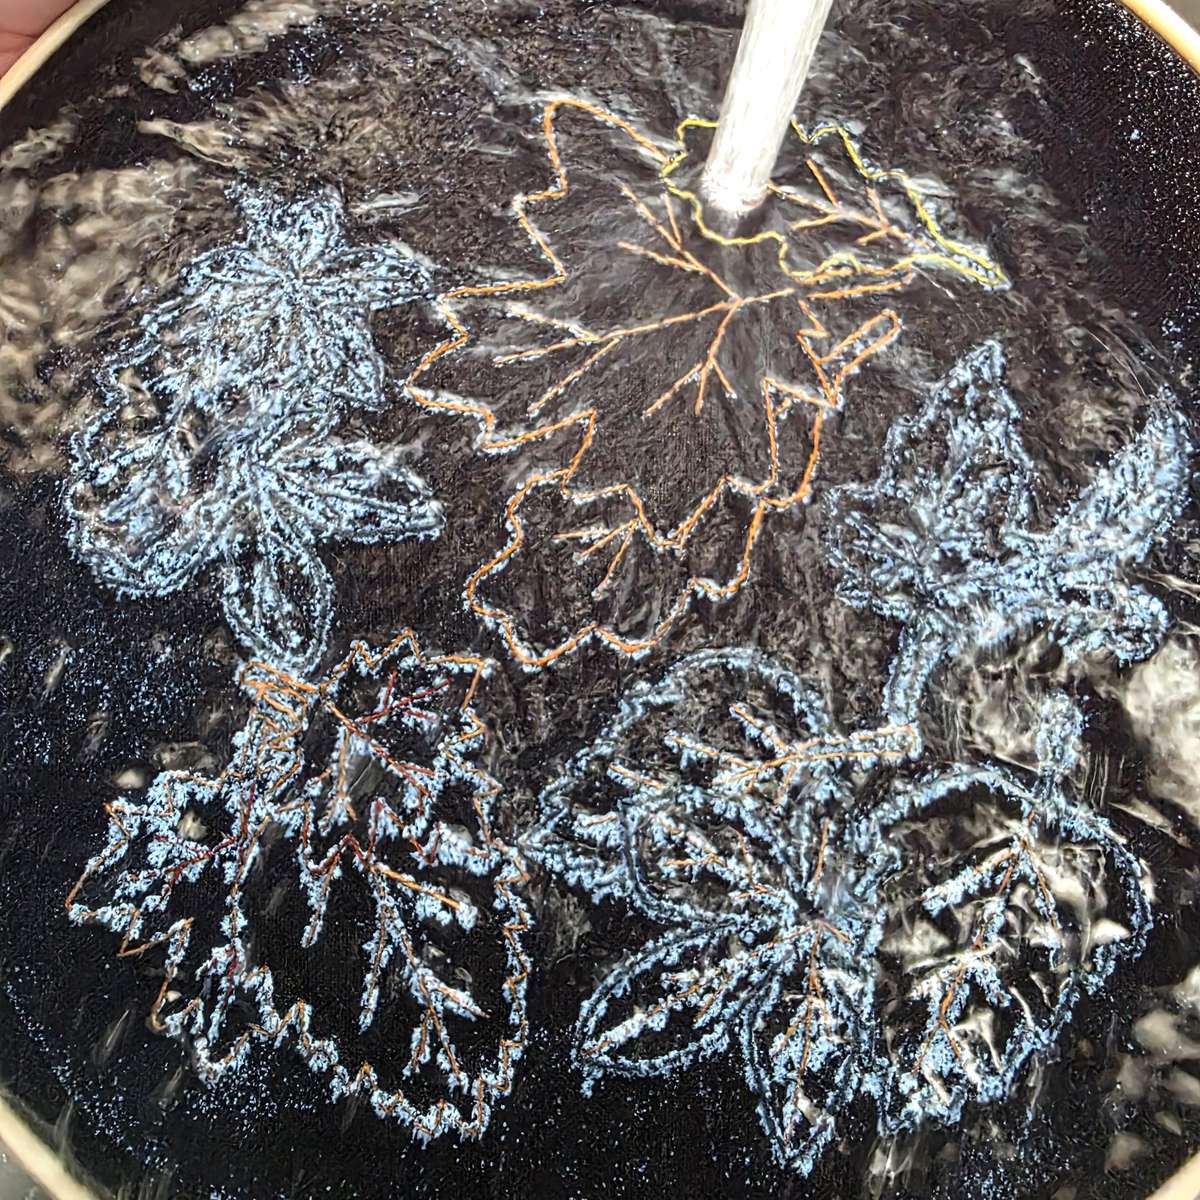
Rinsing away the stabilizer under running water.
Dry fabric ready for more stitching.
Quick Tip
Sometimes it's better to remove the stabilizer before you are done stitching.
I'll explain in the Tips and Troubleshooting section.
I'll explain in the Tips and Troubleshooting section.
Sulky offers the same product in two packaging styles.
Always Test Your Materials First.
Because Stick-and-Stitch needs water to be removed, it isn't appropriate for every fabric or project.
Before using it on something special, make a small test sample using the same:
Before using it on something special, make a small test sample using the same:
- Fabric
- Embroidery floss
- Stabilizer
- Printer ink, if you're printing the design
Stitch a little sample and rinse it exactly as you plan to rinse your finished embroidery. This will tell you whether your thread bleeds, your fabric changes when wet, or you have any difficulty removing the stabilizer.
Testing might seem like an unnecessary extra step, but it is much better to discover a problem on a scrap of fabric than after spending several hours embroidering your project.
Testing might seem like an unnecessary extra step, but it is much better to discover a problem on a scrap of fabric than after spending several hours embroidering your project.
Ready to Give Stick-and-Stitch Embroidery a Try?
Getting started is easy.
- Print or draw your pattern on the stabilizer. (Or use preprinted design sets)
- Cut out the design.
- Remove the backing
- Stick it to your fabric.
- Stitch right through it.
- Then rinse the stabilizer away.
How to Remove Stick-and-Stitch
Once your embroidery is finished, it's time to remove the stabilizer.
- Place your finished embroidery in water and gently allow the stabilizer to dissolve.
- Avoid aggressively rubbing or scrubbing your stitches.
- You may need to gently move the fabric through the water or rinse it again to remove any remaining stabilizer.
- Take your time. Areas with dense stitching can hold onto small pieces longer than open areas.
- Once everything has dissolved, gently remove excess water and allow your embroidery to dry.
For more detailed instructions, you can download the Sulky Instruction sheet.
Tips and Troubleshooting
Some of the downsides of using a stick-and-stitch pattern can be eliminated by using it just to transfer the outline.
In some situations, I use Stick-and-Stitch a little differently than I do for a simple outline embroidery pattern.
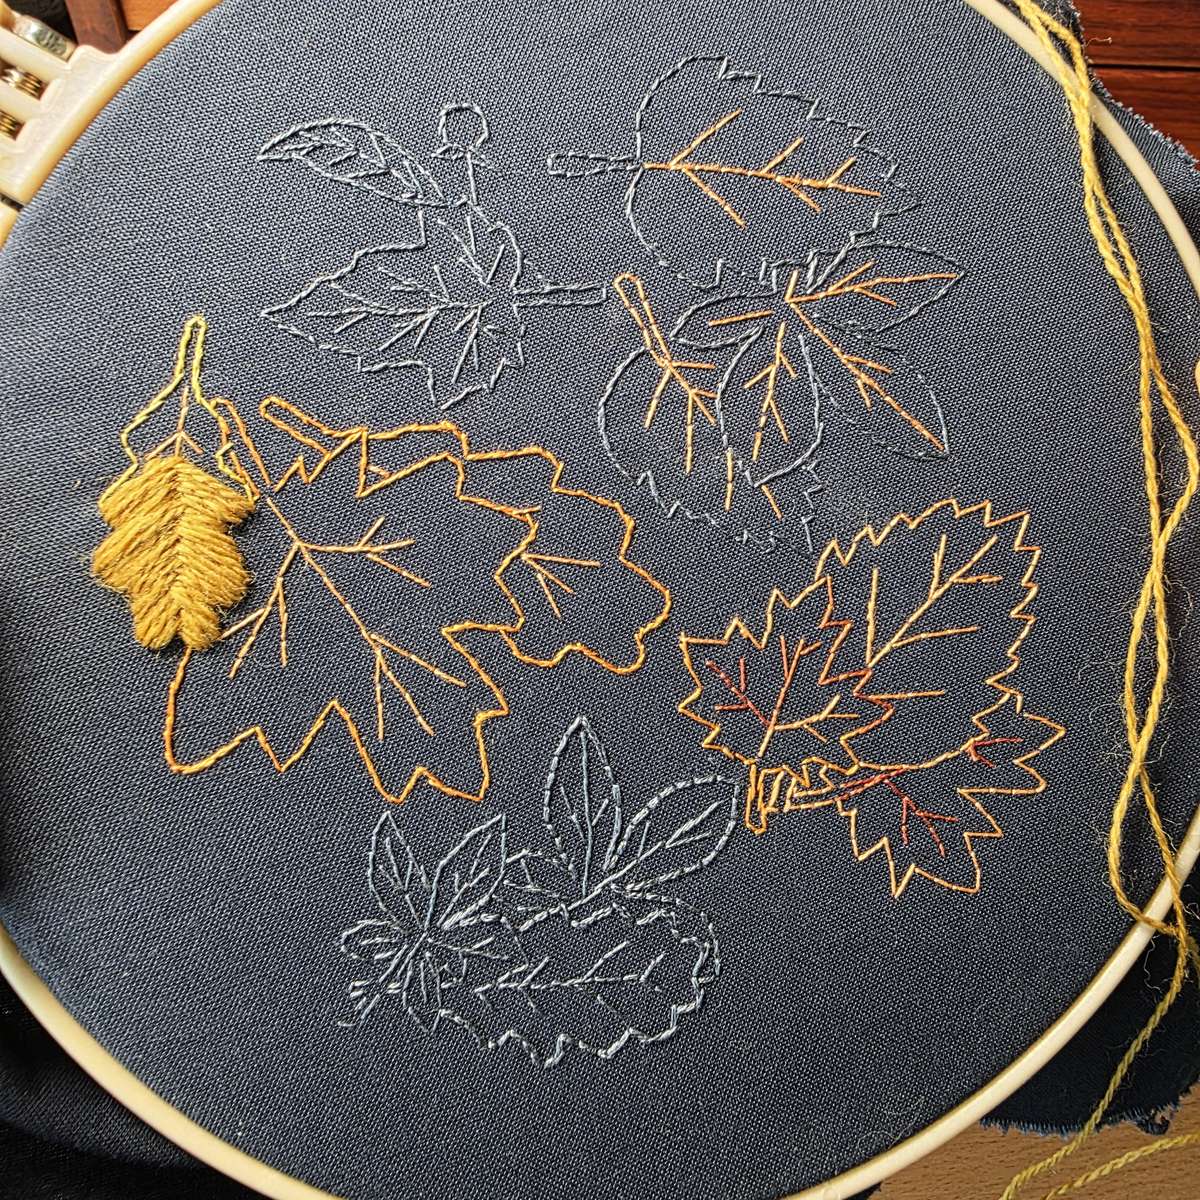
Instead of leaving the stabilizer in place for the entire project, I use it only to establish the outline and important details of the design.
After applying the Stick-and-Stitch to my fabric, I stitch the main pattern lines using just one strand of embroidery floss or sewing thread. I keep these stitches small and neat because they will become my guide once the stabilizer is gone. I've found it works best to stitch the outline in either a color similar to the fabric or colors similar to the final thread colors. This makes it easier to hide these outline stitches.
When the outline is complete, I rinse away the Stick-and-Stitch, allow the fabric to dry completely, and then continue with the thread painting directly on the fabric.
This gives me the accuracy of a printed pattern without having to stitch all of the details through the stabilizer.
I prefer this method for several reasons. It reduces the amount of time I spend stitching through the adhesive layer, helps prevent sticky needles, and makes it easier to see how the thread colors are actually interacting with the fabric. It also means I don't have to worry about removing stabilizer from underneath dense areas of stitching later.
Instead of leaving the stabilizer in place for the entire project, I use it only to establish the outline and important details of the design.
After applying the Stick-and-Stitch to my fabric, I stitch the main pattern lines using just one strand of embroidery floss or sewing thread. I keep these stitches small and neat because they will become my guide once the stabilizer is gone. I've found it works best to stitch the outline in either a color similar to the fabric or colors similar to the final thread colors. This makes it easier to hide these outline stitches.
When the outline is complete, I rinse away the Stick-and-Stitch, allow the fabric to dry completely, and then continue with the thread painting directly on the fabric.
This gives me the accuracy of a printed pattern without having to stitch all of the details through the stabilizer.
I prefer this method for several reasons. It reduces the amount of time I spend stitching through the adhesive layer, helps prevent sticky needles, and makes it easier to see how the thread colors are actually interacting with the fabric. It also means I don't have to worry about removing stabilizer from underneath dense areas of stitching later.
Most importantly, once the stabilizer is gone, I can build my shading, blending, and layers directly on the fabric. The lightly stitched outline remains in place as a guide, but it gradually disappears into the finished embroidery as I add more stitches.
This works well for thread painting, but it's also useful when you are working with specialty threads or threads/floss that aren't colorfast.
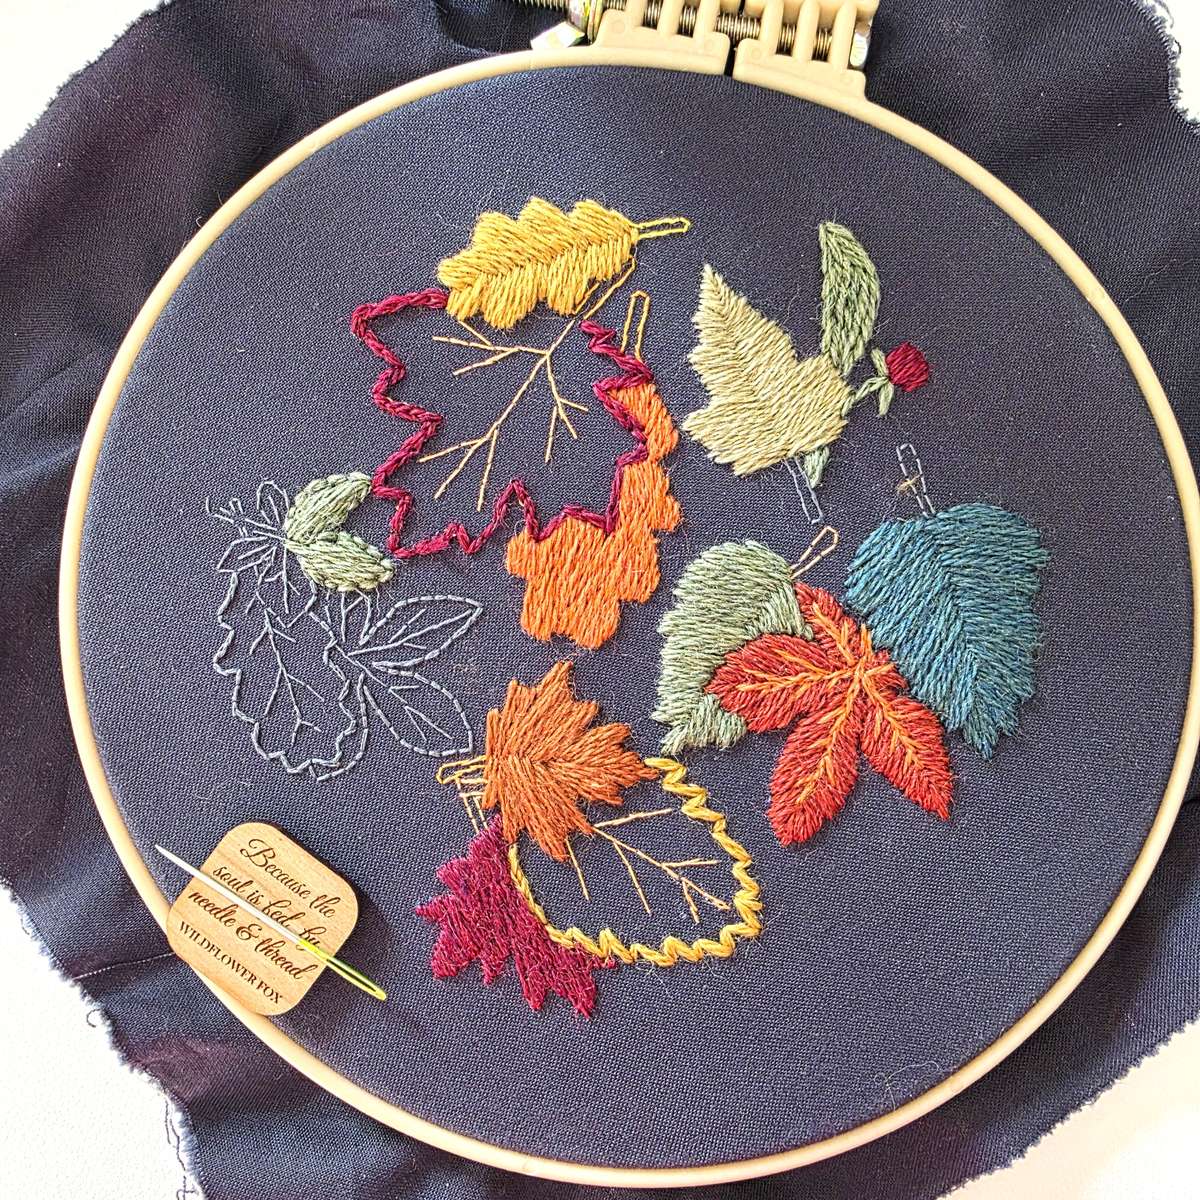
In this example, I wanted to use DMC Eco Vita Wool for the leaves, but I didn't want to pull the wool through the sticky stabilizer. I did the outlines in a mix of orange and gray cotton floss to test colors. The gray floss was harder to see when stitching over the gray lines of the Stick-and-Stitch pattern. However, since I hadn't fully planned out my final colors, I wanted a color that blended with the fabric and was easy to hide.
This works well for thread painting, but it's also useful when you are working with specialty threads or threads/floss that aren't colorfast.
In this example, I wanted to use DMC Eco Vita Wool for the leaves, but I didn't want to pull the wool through the sticky stabilizer. I did the outlines in a mix of orange and gray cotton floss to test colors. The gray floss was harder to see when stitching over the gray lines of the Stick-and-Stitch pattern. However, since I hadn't fully planned out my final colors, I wanted a color that blended with the fabric and was easy to hide.
A Few Tips for This Method
- Use only one strand of colorfast floss or sewing thread for the initial outline.
- Choose a thread color that blends reasonably well with the colors you plan to use in that area of the design, or one that blends with the fabric.
- Use a back stitch to keep your outlines neat.
You also don't need to outline every tiny detail. Concentrate on the major shapes, important boundaries, and any lines you know you'll need once the printed pattern is gone. For areas where you need to layer certain design elements, such as the veins in the leaves, keep a printed image of the pattern nearby for reference.
Be sure to let the fabric dry completely after rinsing before you continue stitching. Once it is dry and back in the hoop, you can begin your embroidery project with a clean surface and a clear stitched guide.
Resolving Common Issues
Stick ’n Stitch is easy to use, but a few common issues can come up. Most are simple to fix once you know what to watch for.
My Needle Feels Sticky - Because Stick-and-Stitch has an adhesive backing, some of that adhesive can transfer to your needle as you stitch. If your needle starts to feel sticky or becomes harder to pull through the fabric, wipe it clean with a soft cloth and rubbing alcohol. Changing to a fresh needle can also help if you have been working on the project for a long time.
The Stabilizer Is Hard to Stitch Through - Stick-and-Stitch adds an extra layer between your needle and fabric, so you may notice more resistance than you would when stitching directly on fabric. A new sharp embroidery needle usually makes stitching easier. If the needle feels difficult to pull through, try moving up one needle size rather than forcing it.
Also check your hoop tension. Fabric held taut is generally easier to stitch through than loose fabric.
The Stabilizer Won’t Completely Dissolve - Sometimes small pieces of stabilizer remain trapped beneath stitches, especially in areas with dense stitching, French knots, or satin stitch. Give the embroidery a little more time in the water and gently move the fabric around to help loosen the remaining stabilizer. You may need to rinse the project more than once.
Avoid aggressively rubbing or picking at your stitches. Patience is usually the safest approach.
My Embroidery Feels Stiff After Rinsing - If the fabric still feels stiff after it dries, some stabilizer may remain in the fibers. Rinse or soak the embroidery again, paying particular attention to heavily stitched areas. Once all of the stabilizer has dissolved, the fabric should feel much more natural again.
The Printed Ink Is Bleeding - Printer ink can sometimes run when the stabilizer is rinsed away. This is why I recommend testing your printer and stabilizer before using them on an important project. Print a small test design, stitch a few lines, and rinse it to see how the ink behaves.
Using less ink can also help, so a standard or draft print setting may work better than a high-quality or photo setting.
My Embroidery Floss Is Bleeding - The stabilizer itself may not be the problem. Since Stick-and-Stitch has to be dissolved in water, the rinsing process can reveal whether your embroidery floss is colorfast. Dark reds, burgundy, navy, black, and some hand-dyed threads can be especially worth testing.
Before beginning your project, stitch a small sample using the same fabric and thread and rinse it the same way you plan to rinse the finished embroidery. A few minutes of testing can save a finished project.
The Stabilizer Is Lifting From the Fabric - Stick-and-Stitch adheres best to clean, dry fabric. If the edges begin lifting, gently press them back into place. Avoid repeatedly peeling the stabilizer up and repositioning it, since that can weaken the adhesive. For larger designs, smoothing the stabilizer from the center outward can help prevent wrinkles and loose edges.
My Pattern Wrinkled When I Applied It - Once the adhesive touches the fabric, it can be difficult to reposition the stabilizer without stretching or wrinkling it. For larger patterns, remove part of the backing first rather than peeling the entire sheet away at once. Position one section, smooth it down, and gradually remove the rest of the backing as you work across the design.
My Stitches Look Too Tight or Loose After the Stabilizer Is Removed - Try to maintain your normal embroidery tension and let the stitches rest comfortably on the surface. Remember that once the stabilizer dissolves, that extra layer disappears. Stitches that were pulled too tightly may pucker the fabric afterward. Additionally, stitches not pulled tight enough will be even looser. Sometimes it just takes some practice to get a feel for the proper tension.
When in Doubt, Make a Test Sample - Use a scrap of the same fabric, the same floss, the same printed stabilizer, and the same stitches you plan to use in your project.
Stitch a small sample and rinse it. You'll quickly learn how the stabilizer behaves with your particular combination of fabric, thread, printer ink, and stitches. Stitching up a couple of quick samplers can prevent unwanted surprises later.


