

Embroidery Stitch Instructions
Stitch Library
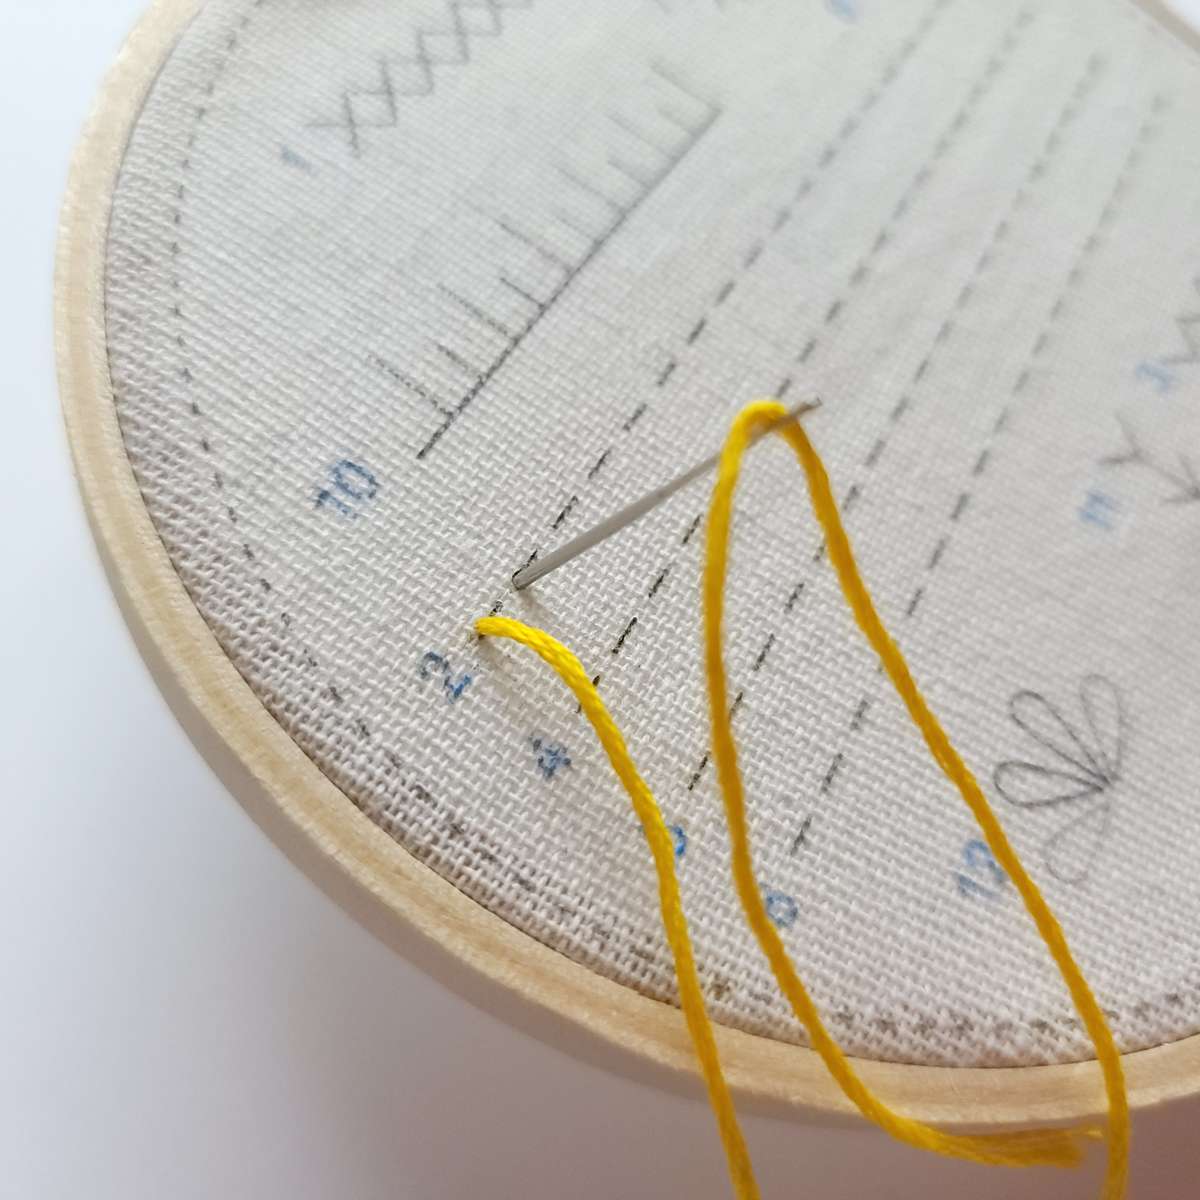
If I use a stitch in one of my tutorials, the instructions for completing that stitch will be here. I am working on adding more stitches, with videos coming soon.
This page is a quick resource for learning the stitches used in my tutorials. However, there are hundreds more stitches to explore, and the best resource for learning new stitches is the RSN Stitch Bank.
The link below will take you to a different website. I am not affiliated with RSN.
This page is a quick resource for learning the stitches used in my tutorials. However, there are hundreds more stitches to explore, and the best resource for learning new stitches is the RSN Stitch Bank.
The link below will take you to a different website. I am not affiliated with RSN.
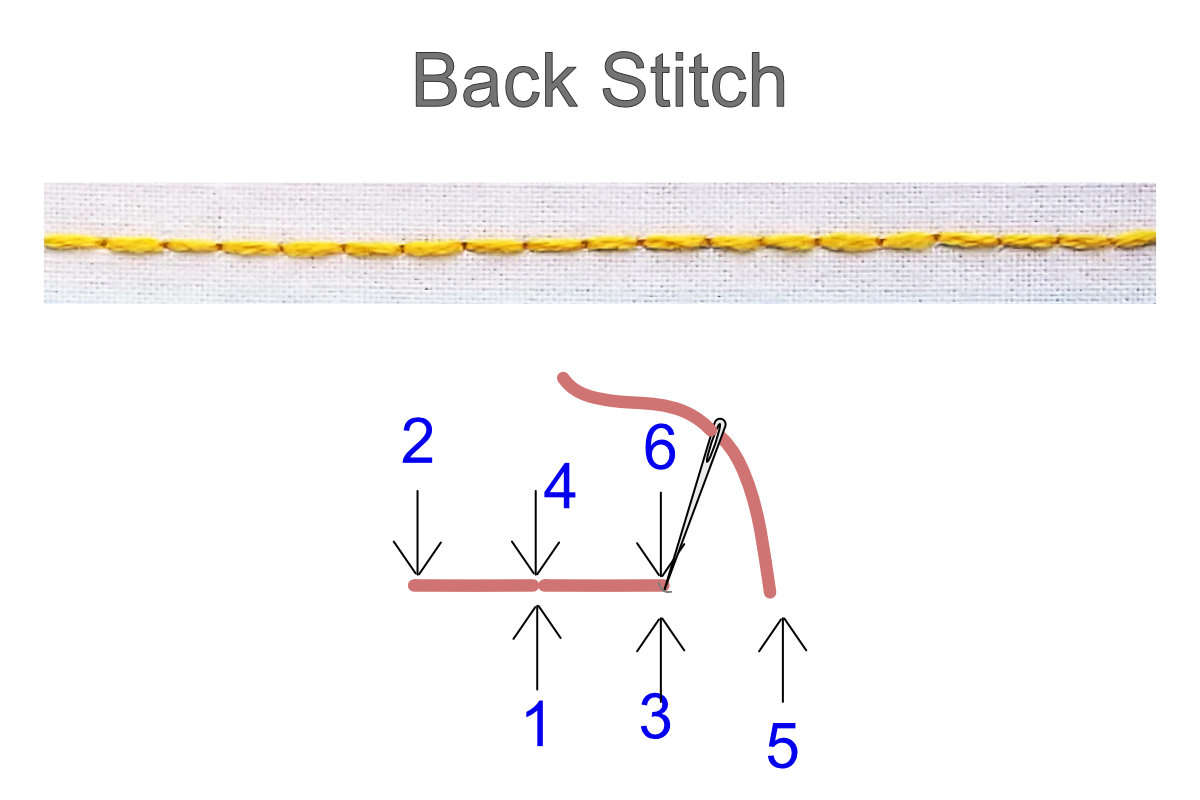
To Complete the Back Stitch
Start on the back side of the fabric and bring your needle up through the fabric at 1 then down through at 2. Bring your needle up through at 3 and back down at 4 in the same hole as 1. Each stitch is made by moving forward on the back side then back to the previous stitch on top.
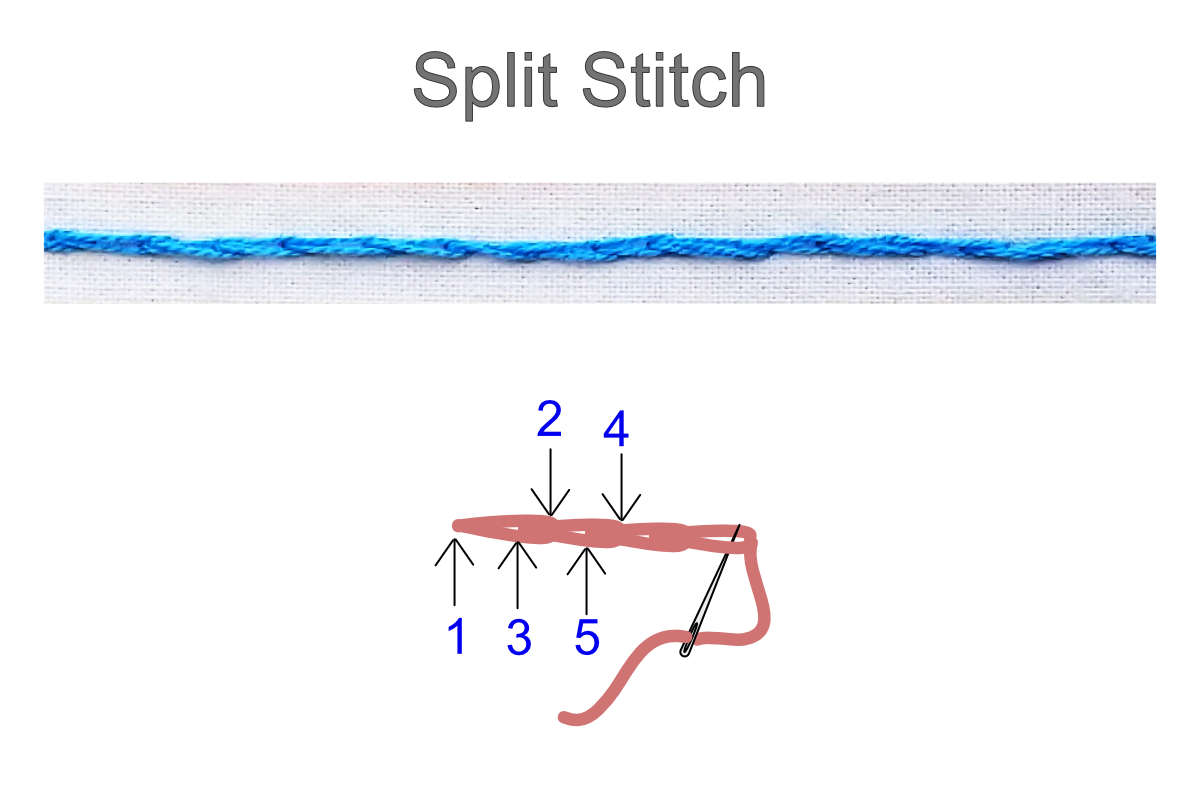
To Complete the Split Stitch.
Start on the back side of the fabric and bring your needle up through the fabric at 1 then down through at 2. Bring your needle up through at 3 stitching through the previous stitch piercing the strands of floss. Create another stitch by bringing your needle down at 4 and up at 5 repeating the process.
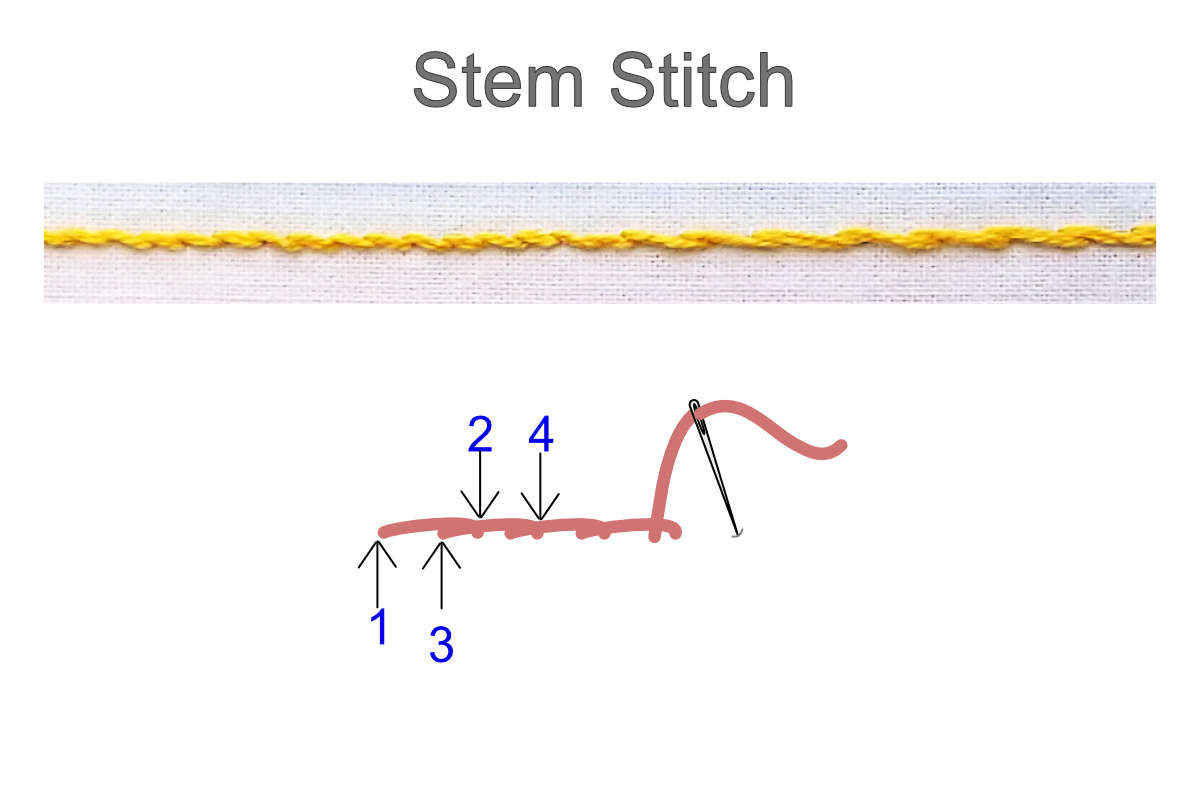
To Complete the Stem/Outline Stitch
Start on the back side of the fabric, bring your needle up through the fabric at 1, then down through at 2. Then, holding your first stitch to the side slightly,
bring your needle up at 3, being careful not to pierce the first stitch. Then go down at 4 to make your next stitch. Your stitches will overlap slightly. Stay consistent by always bringing your needle up on the same side of the stitch.
The Stem Stitch and Outline Stitch are almost the same stitch. In the stem stitch, the loop goes to the right of the needle. In the outline stitch, the loop goes to the left of the needle.
bring your needle up at 3, being careful not to pierce the first stitch. Then go down at 4 to make your next stitch. Your stitches will overlap slightly. Stay consistent by always bringing your needle up on the same side of the stitch.
The Stem Stitch and Outline Stitch are almost the same stitch. In the stem stitch, the loop goes to the right of the needle. In the outline stitch, the loop goes to the left of the needle.
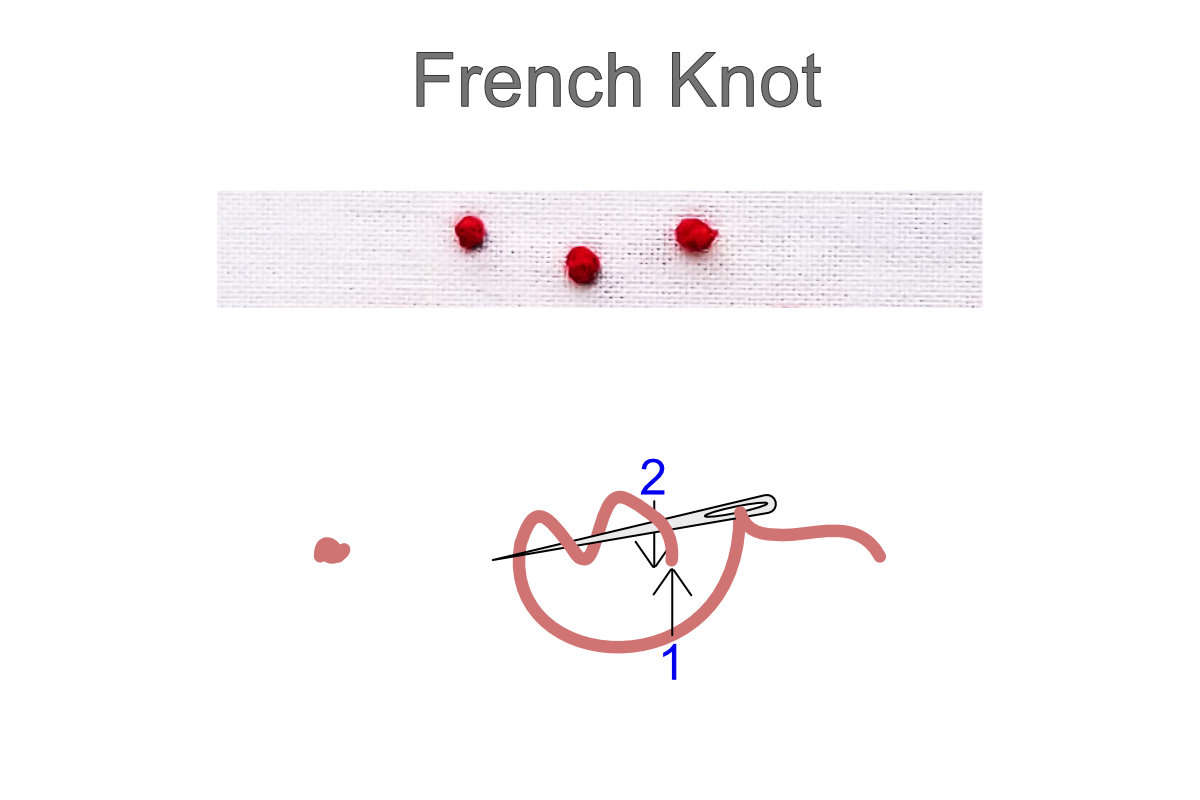
To Complete a French Knot
Note: This stitch requires two hands.
The French knot can be a little tricky to master, but once you get the hang of it, it will become one of your favorite stitches.
Start on the back side of the fabric, bring your needle up through the fabric at 1. Keeping the needle point close to the fabric at 1, wrap the thread around the needle 2 or 3 times. With the needle point resting on 2, pull the thread taut and down to the needle point. Keeping tension on the wrapped thread, push the needle down in 2, right next to 1 but not in the same hole.
The French knot can be a little tricky to master, but once you get the hang of it, it will become one of your favorite stitches.
Start on the back side of the fabric, bring your needle up through the fabric at 1. Keeping the needle point close to the fabric at 1, wrap the thread around the needle 2 or 3 times. With the needle point resting on 2, pull the thread taut and down to the needle point. Keeping tension on the wrapped thread, push the needle down in 2, right next to 1 but not in the same hole.
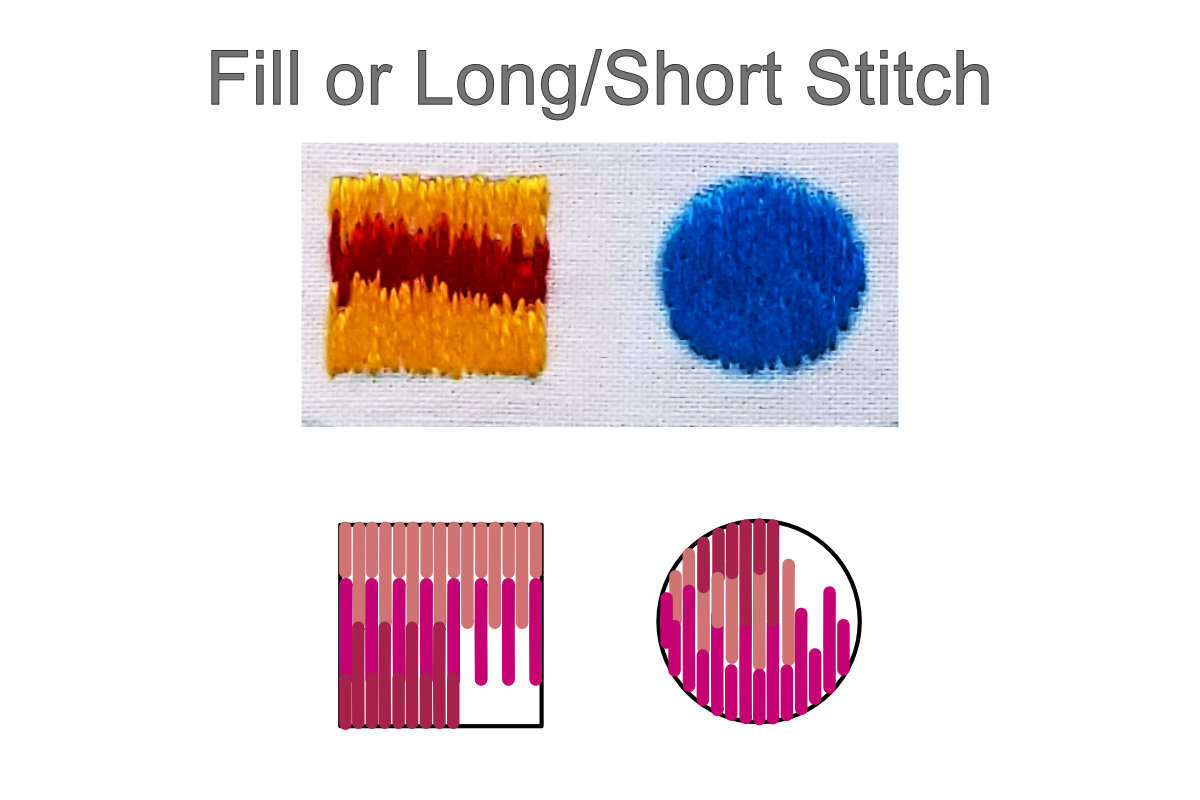
To Complete the Long-Short Stitch
Use the long and short stitch to fill large shapes. You can use one color or multiple for different shading.
Starting at the top or bottom of a shape, create a row of parallel stitches, varying their lengths. Next, work a second row of long stitches into the short stitches of the first row, passing the needle through the stitch above. Continue working rows until the shape is filled. When filling circles, be careful not to go too far out on the sides, or the circle will start to look more oval. If you are having trouble keeping your stitches straight, use a ruler to draw parallel lines in.
Starting at the top or bottom of a shape, create a row of parallel stitches, varying their lengths. Next, work a second row of long stitches into the short stitches of the first row, passing the needle through the stitch above. Continue working rows until the shape is filled. When filling circles, be careful not to go too far out on the sides, or the circle will start to look more oval. If you are having trouble keeping your stitches straight, use a ruler to draw parallel lines in.
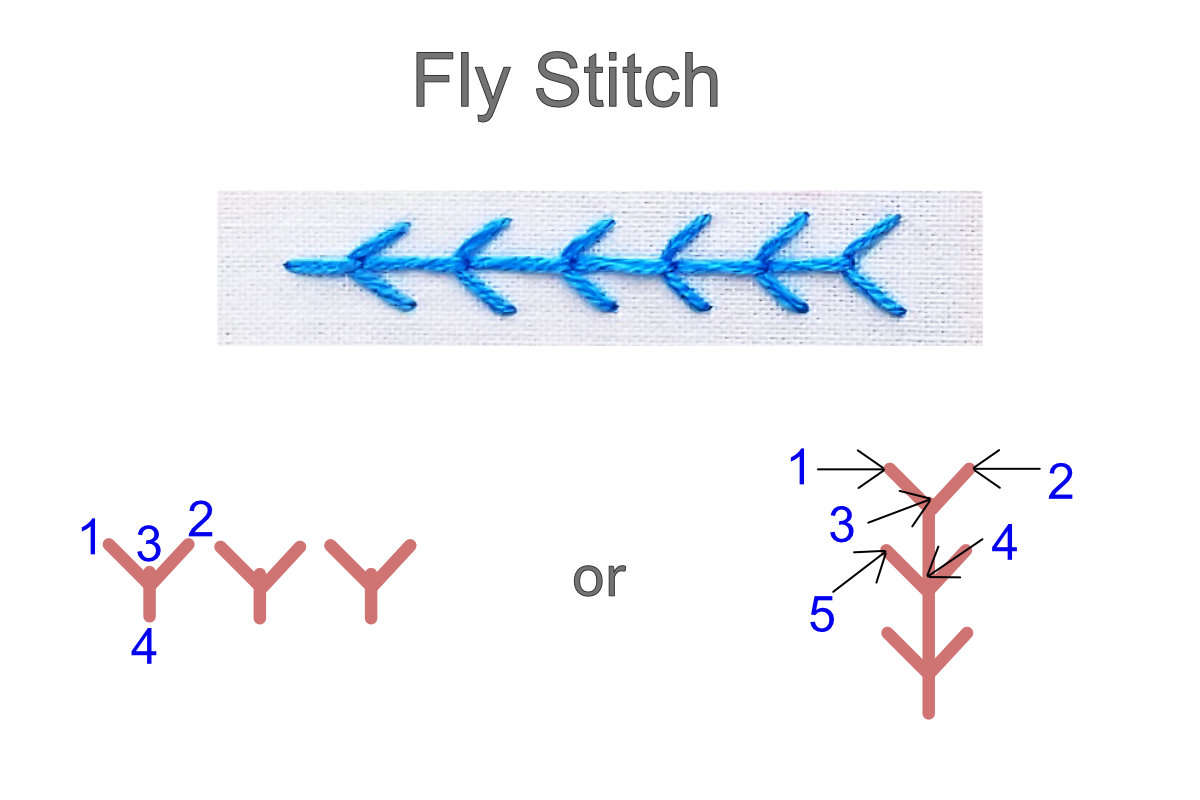
Start on the back side of the fabric and bring your needle up through the fabric at 1, then down through at 2, leaving a loop. Come up at 3 with the needle over the loop, and pull the thread to a V shape. Go down at 4 to anchor the V shape.


